
Inviting Partners
Recruit affiliates by email or from your other programs, with an invitation written from your program's real terms
The fastest way to grow a young program is to invite people yourself — creators you already know, customers who love the product, or partners performing well in your other programs. Affitor turns that into a two-step flow: pick recipients, send an email that's already written for you.
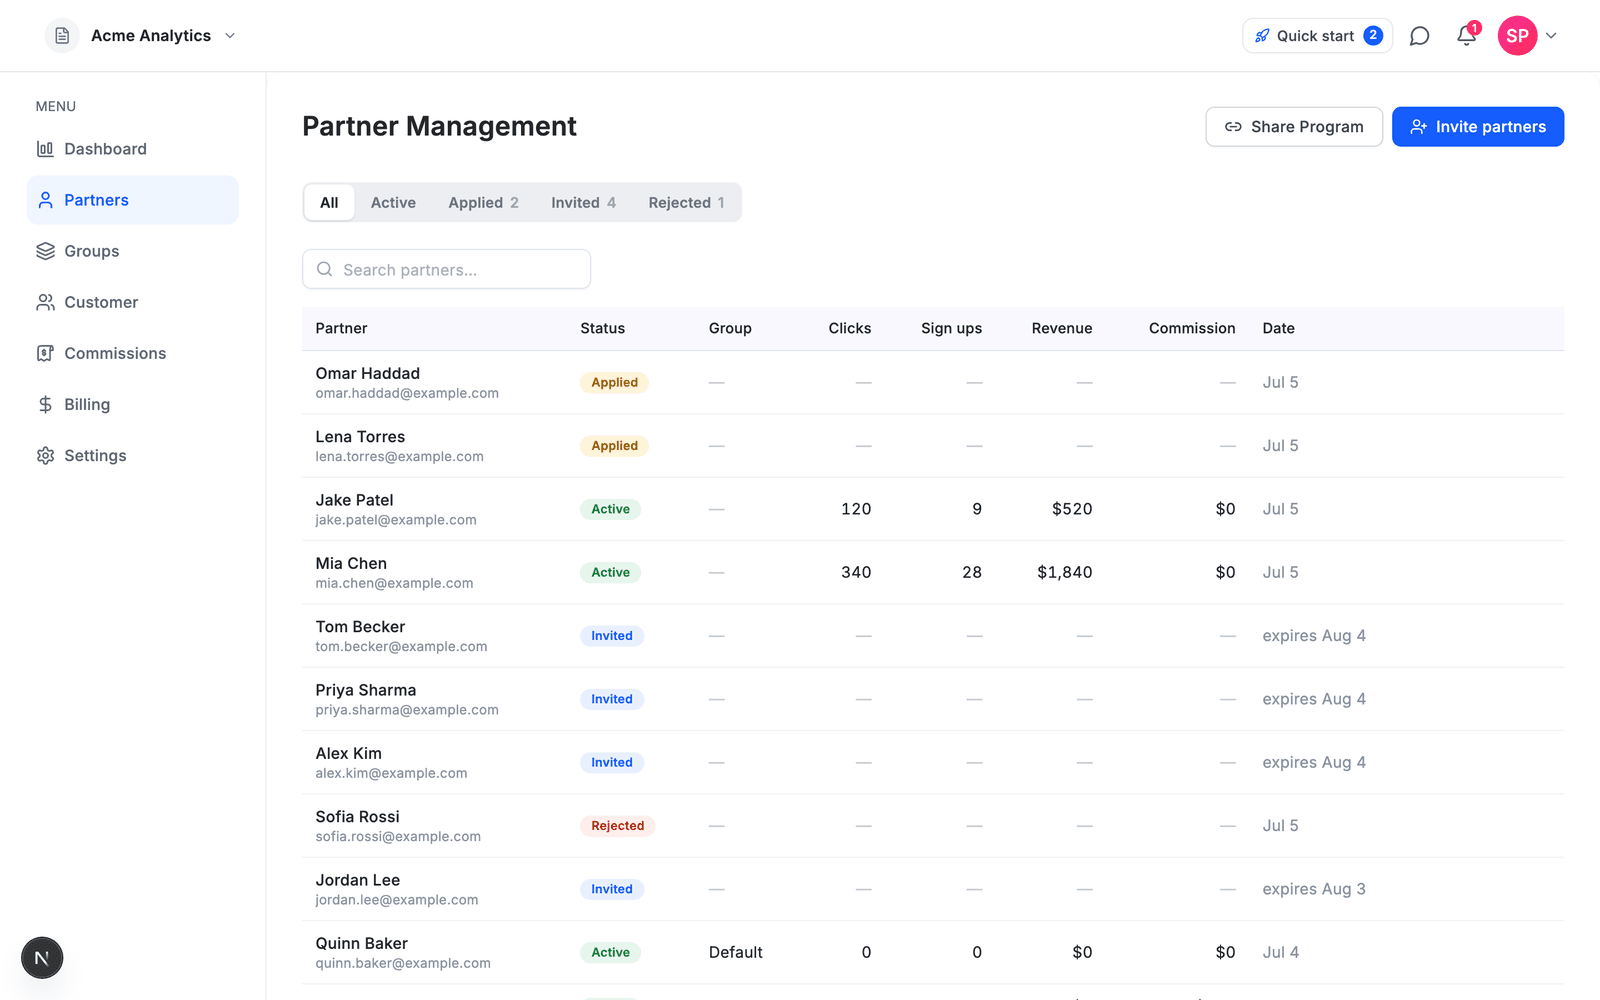
Your Partners page shows everyone in one table — active partners with their stats, applications waiting for review, invites still pending, and rejections — each with a status badge. The tabs across the top are filters on the same list.
Step 1 — Pick recipients
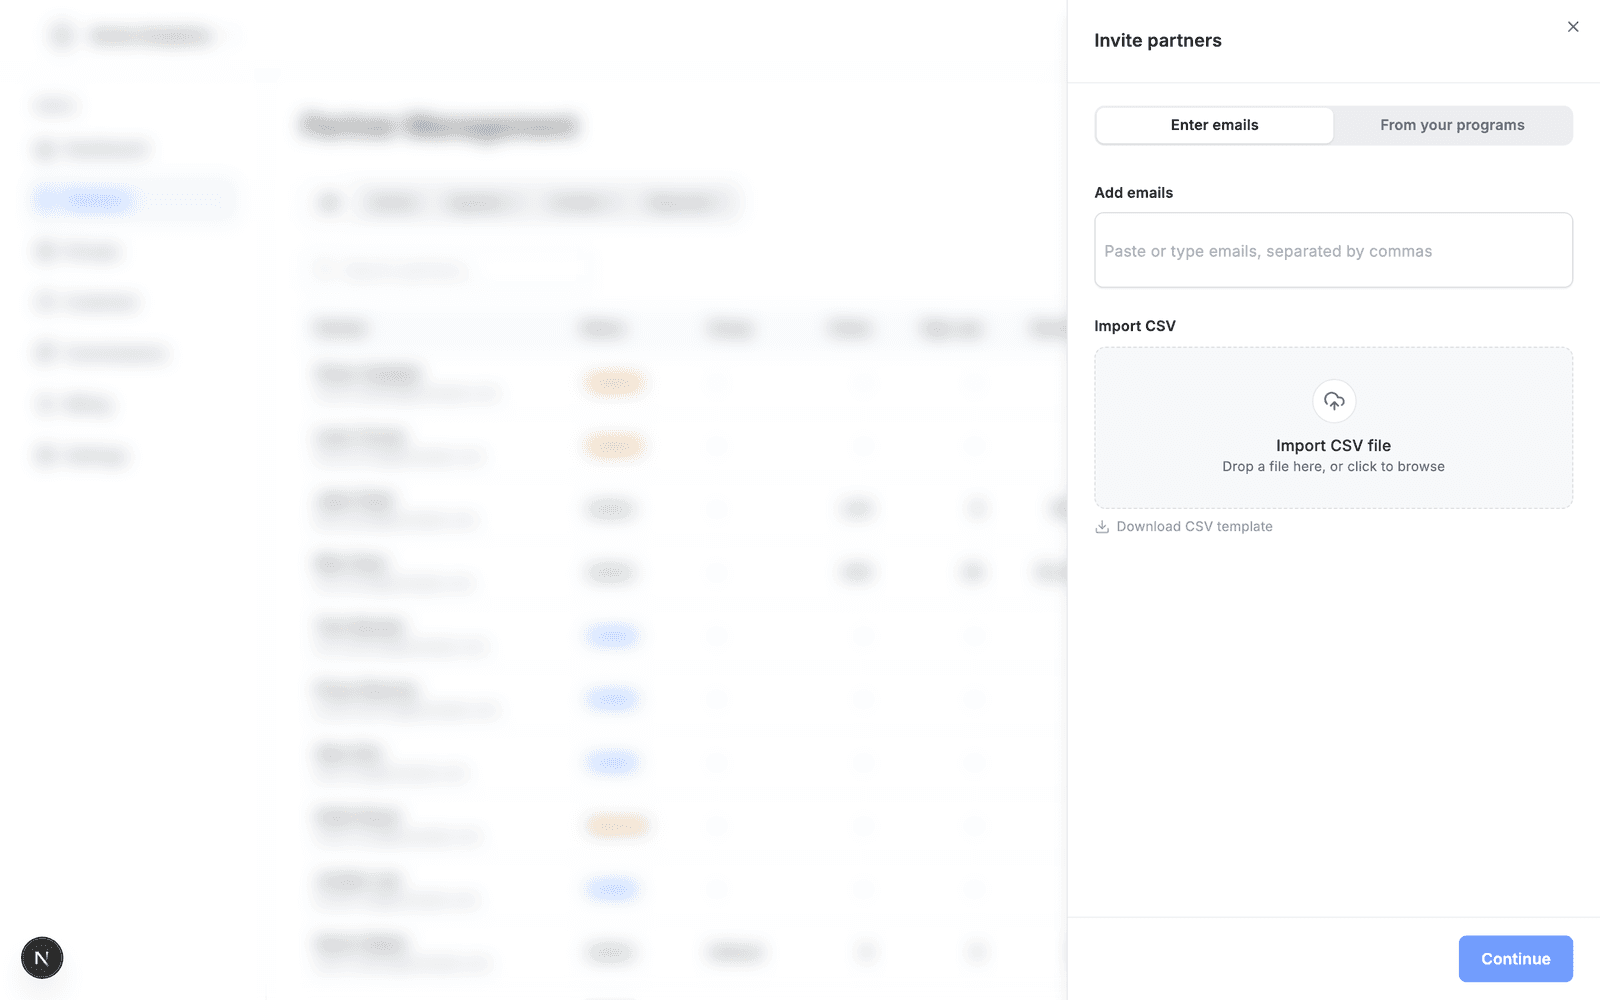
Click Invite partners (top right). There are two ways to add people:
By email
Type or paste email addresses — one at a time, comma-separated, or straight from a spreadsheet. You can also import a CSV; if it has a name column next to the emails, Affitor picks the names up automatically.
From your other programs
If you run more than one program on Affitor, the From your programs tab lists partners already working with you elsewhere — with a per-program filter and search. Tick the ones you want; they're often your best recruits because they already know how you work.
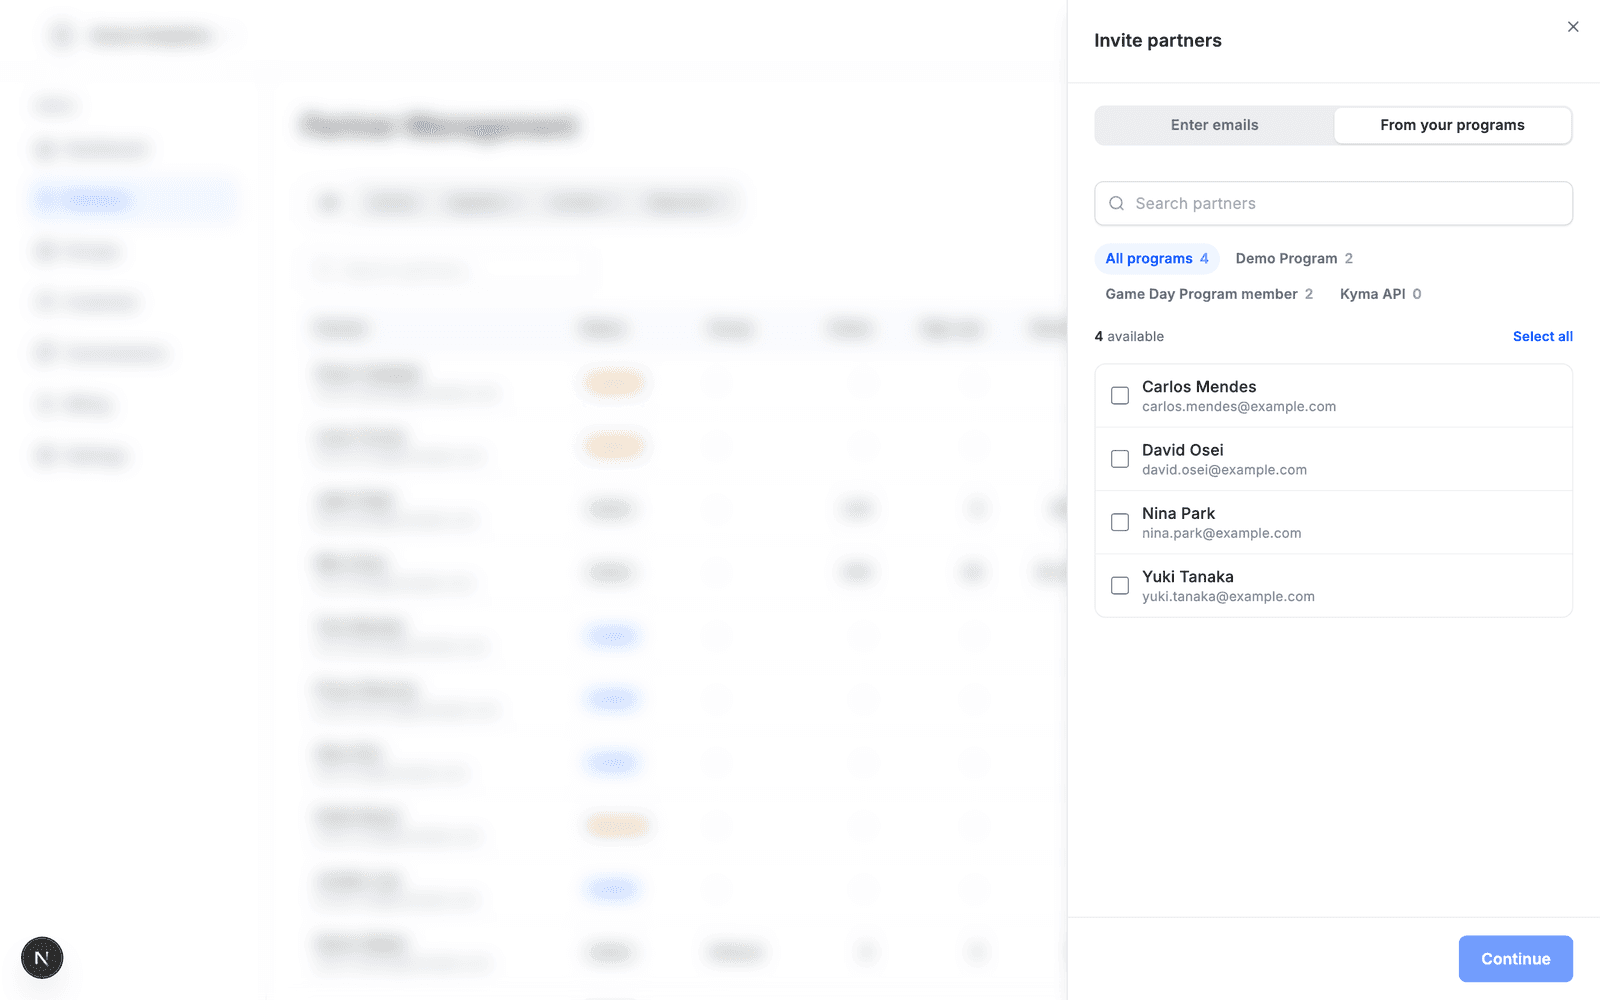
Up to 50 recipients per batch. Anyone who is already in the program, or already has a pending invite, is skipped automatically — you can't double-invite someone.
Step 2 — The invitation email (already written)
Hit Continue and the email is waiting for you, pre-written from your program's real terms — commission model and rate, attribution window, payout threshold. Terms you haven't configured are simply left out.
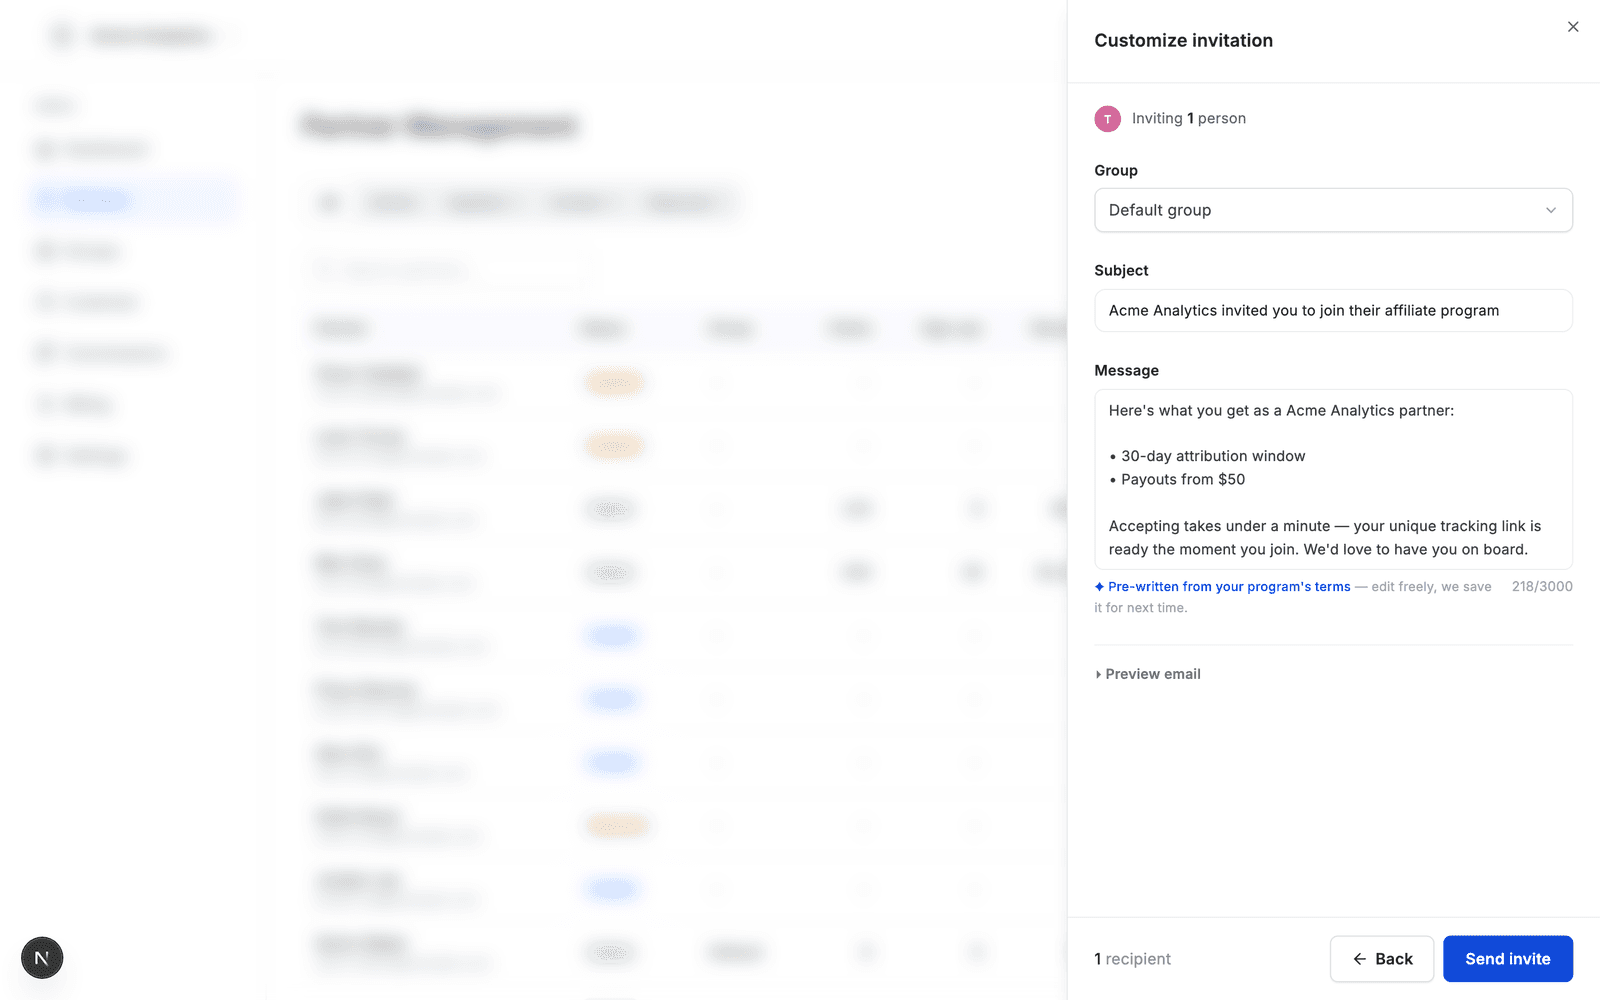
- Edit anything — subject and message are plain fields. Your edited version is saved per program and used next time.
- ↺ Reset brings back the generated template.
- Preview email expands to show exactly what recipients will see — the header, your message, the Accept button, and the 30-day expiry note.
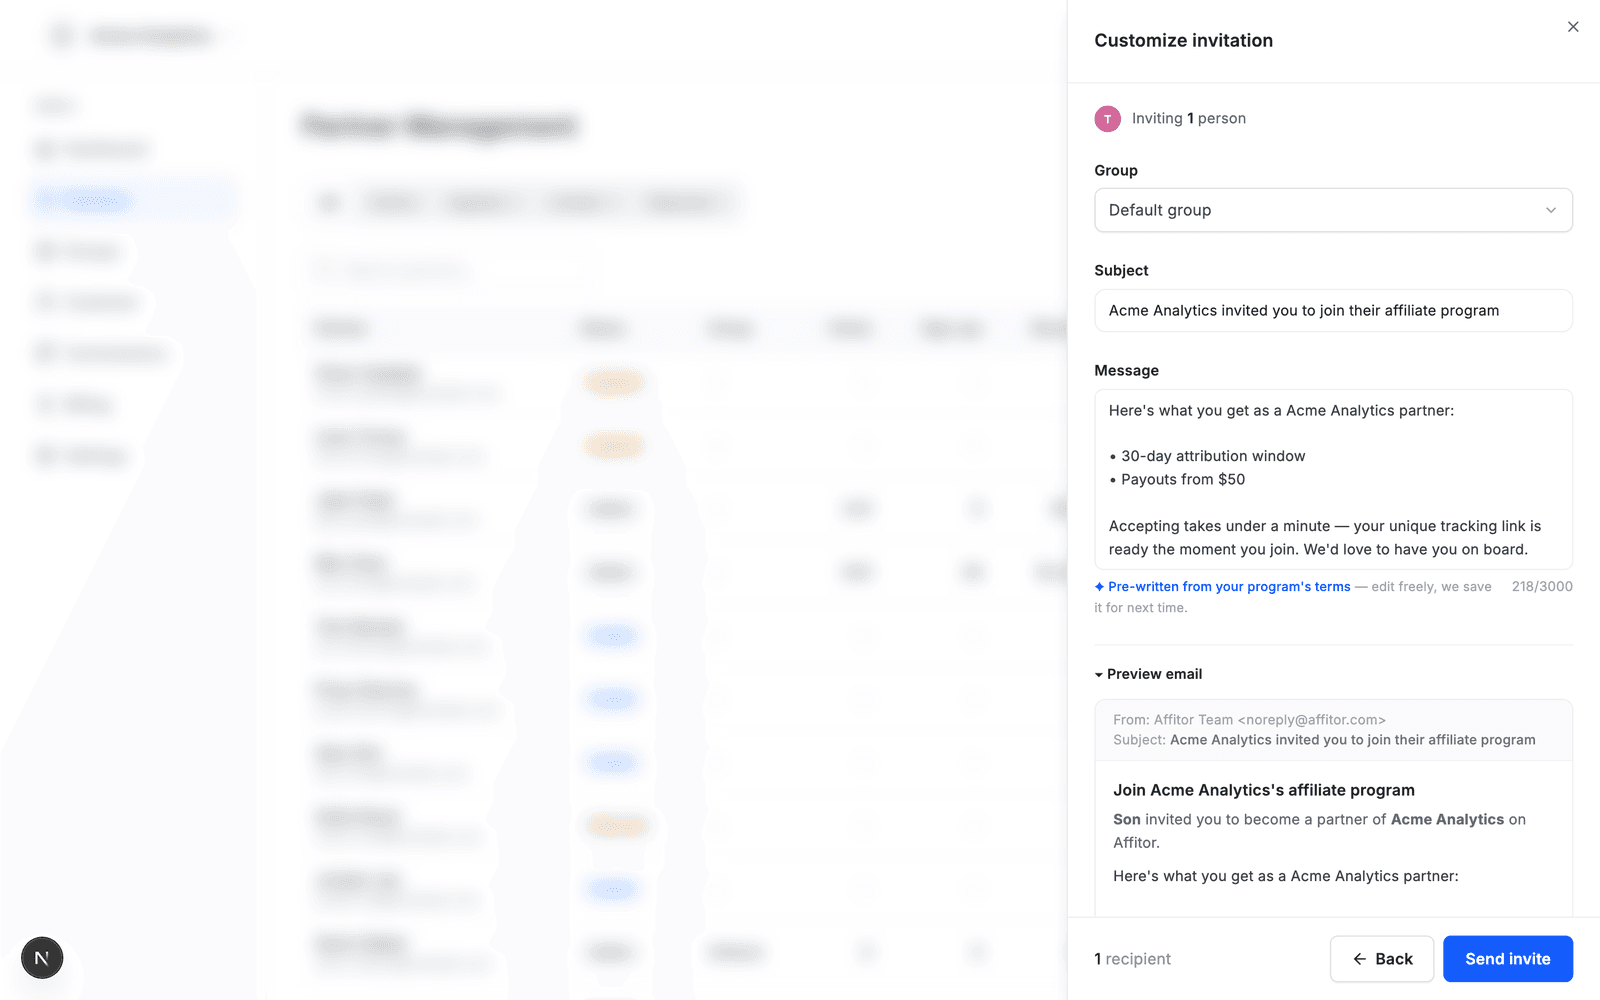
Optionally choose a Group so accepted partners land with the right commission policy from day one.
Click Send invite — done.
After sending
- Invites appear in the Partners table with an Invited badge and their expiry date (30 days).
- Hover an invited row for Resend invite or Cancel invite.
- When someone accepts, they flip to Active automatically and get their tracking link immediately — no application review needed, since you invited them.
- If an invite email fails to deliver, the row shows a warning with the reason.
Verify it worked
Send one invite to your own email before the real batch:
- Your inbox shows the invitation with your program's terms in the body and a working Accept button
- The Partners table shows the address with an Invited badge and a 30-day expiry; after you accept from the email, the row flips to Active and the partner detail shows a tracking link
- A failed delivery is flagged on the invite row with the reason — hover the row and use Resend invite once fixed
Tips
- Groups first. If you plan different commission tiers (e.g. VIPs vs. newsletter partners), create the groups before inviting, so each batch lands in the right one.
- Keep the terms honest. The generated email quotes your live program settings — if the commission or cookie window changes later, new invites pick the new terms up automatically.
- Invite in passes. Start with the 5–10 people most likely to accept; their early links and sales make the program look alive for everyone who applies after.